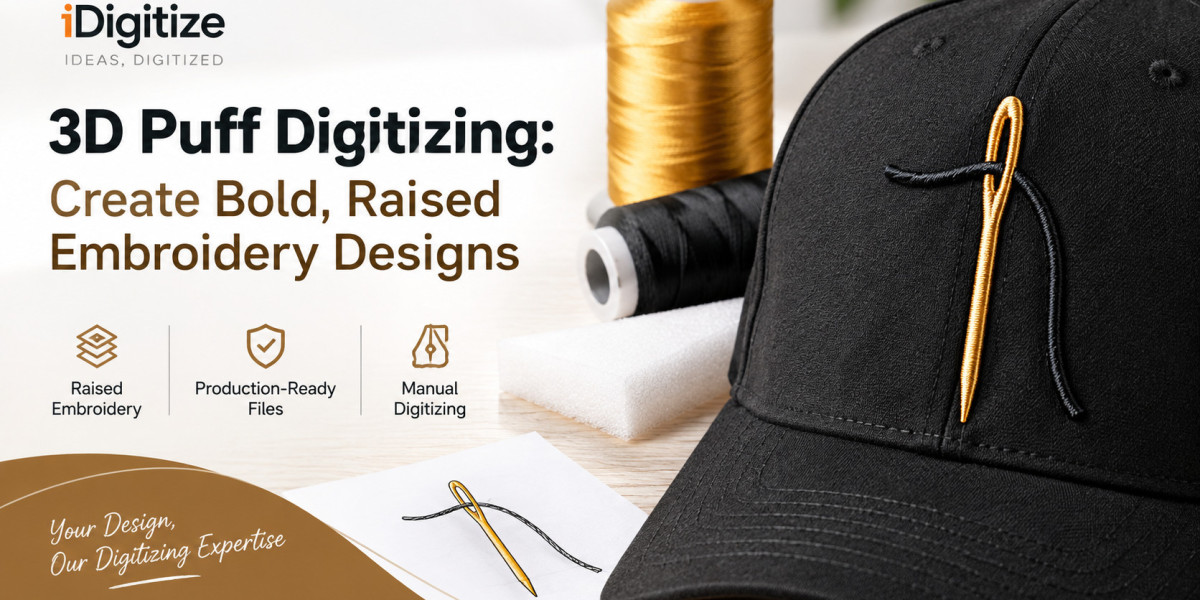
Raised embroidery gives logos, lettering, and simple artwork a dimensional appearance that flat embroidery cannot create in the same way. 3D Puff Digitizing converts your artwork into an embroidery file designed to cover foam with stitches, producing a raised effect after the embroidery is finished.
At iDigitize, we create files specifically for puff embroidery, including designs for caps, hats, jackets, hoodies, lettering, logos, and hybrid flat-and-puff applications. Our 3D Puff Digitizing Services are based on manual digitizing and include production-ready formats for different embroidery machines.
In this guide, we explain how puff digitizing works, which designs are suitable, what stitch decisions matter, and what you should provide before ordering a file.
What Is 3D Puff Digitizing?
3D Puff Digitizing is the process of converting 2D artwork into an embroidery file that uses foam underneath the stitches to create a raised, three-dimensional effect.
Unlike standard flat embroidery, puff embroidery requires the digitizer to plan how stitches will cover and secure the foam. The design must account for stitch direction, density, spacing, outlines, and the amount of detail that can be embroidered successfully.
The foam is generally placed beneath the embroidery area. Satin stitches cover the foam, and after stitching, excess foam can be removed around the design. The result is a raised embroidered surface.
For this reason, a regular embroidery file cannot simply be converted into a puff design without adjusting its structure.
How Does 3D Puff Digitizing Work?
The digitizing process determines how an embroidery machine will build the raised design. We consider the artwork, intended size, placement, fabric, and machine format when preparing a production file.
A typical process includes:
- Artwork preparation: We review the logo or artwork and identify elements suitable for puff embroidery.
- Design simplification: Fine details or very small elements may need adjustment because puff foam works better with bold shapes.
- Stitch planning: We determine stitch direction, density, underlay, sequencing, and satin stitch coverage.
- Foam coverage: The stitch structure is planned so the foam is adequately covered.
- Edge definition: Borders and satin stitches help create clean edges around raised elements.
- Quality checking: We manually review the embroidery file before delivery.
Our service page explains that puff embroidery uses satin stitch layers to cover foam, with the foam encapsulated beneath the fabric.
Which Designs Work Best for 3D Puff Embroidery?
The strongest candidates are usually bold designs with clear shapes and sufficient space between elements. Large lettering, thick outlines, simple logos, and recognizable symbols can work particularly well.
Good candidates include:
- Bold company logos
- Block lettering
- Sports team-style graphics
- Monograms
- Simple emblems
- Large initials
- Cap and snapback logos
- Selected jacket-back designs
- Simple symbols and icons
Small text and highly detailed artwork can be difficult because the stitches need enough room to cover the foam properly. Very narrow lines may also cut through the foam rather than producing a clean raised surface.
Before we begin, we recommend considering the final embroidery size. Artwork that looks clear on a computer screen may require simplification when reproduced at a smaller physical size.
What Stitch Considerations Matter?
Puff embroidery requires different digitizing decisions from standard flat embroidery. Stitch density, stitch length, width, and design detail all affect the final result.
On our service page, we explain that puff embroidery generally uses tighter stitch density than traditional embroidery because the stitches need to cover the foam effectively. Our page gives approximately 0.2–0.25 mm as a puff-density reference compared with approximately 0.4 mm for standard digitizing.
The exact settings still depend on the artwork, material, size, and production requirements. A professional digitizer should not treat every design identically.
Why Design Simplicity Matters
A common mistake is trying to preserve every tiny detail from the original artwork. Puff foam has physical limitations, so excessive detail can create problems.
We look for areas where:
- Lines are wide enough to embroider
- Letters have sufficient space
- Shapes can support the raised effect
- Stitch paths remain practical
- Foam can be covered effectively
- Small details do not become visually crowded
The goal is not simply to add more stitches. The goal is to create a file that translates the artwork into a clean raised embroidery structure.
Where Is 3D Puff Embroidery Commonly Used?
Caps and hats are particularly associated with raised embroidery because the dimensional effect works well with bold front-panel logos. However, puff embroidery is not limited to headwear.
We provide puff digitizing for applications such as:
- Baseball caps
- Snapback hats
- Beanies
- Jacket backs
- Hoodies
- Sweatshirts
- Logos and emblems
- Lettering and typography
- Hybrid puff-and-flat designs
Our 3D Puff Digitizing Services also cover hybrid designs where selected elements receive the raised treatment while other areas remain flat. This can help create visual contrast without making every part of the artwork three-dimensional.
What File Formats Are Available?
The embroidery file format depends on your machine and production setup. We support major formats including DST, PES, EMB, EXP, JEF, VP3, HUS, and XXX.
When placing an order, tell us which machine or file format you need. Providing the correct format helps ensure that the finished file is ready for your embroidery workflow.
Common machine-related formats include:
- DST: Widely used in commercial embroidery
- PES: Commonly associated with Brother machines
- JEF: Used with Janome embroidery systems
- EXP: Used with certain commercial and professional systems
- VP3: Associated with some Husqvarna Viking systems
- HUS: Used with certain Husqvarna embroidery machines
We can prepare the file according to the format required for your machine.
What Should You Provide Before Ordering?
The quality of the source artwork matters, but you do not necessarily need a perfect embroidery-ready image.
When you send us your design, we recommend providing:
- Your logo or artwork
- Desired embroidery size
- Garment or product type
- Placement information
- Fabric type, when known
- Required embroidery machine format
- Any specific design instructions
For example, a cap logo may require different considerations from a large jacket-back design. Our ordering process specifically asks for information such as size, fabric type, placement, and required file format.
This information gives us useful production context before we begin the digitizing process.
Common 3D Puff Digitizing Mistakes
Poor puff embroidery often starts with a file that was not designed around the physical characteristics of foam and embroidery.
Common mistakes include:
Using Too Much Detail
Tiny details can become unclear when embroidered with foam. Simplifying the artwork can produce a cleaner result.
Making Letters Too Small
Small lettering may not have enough room for effective satin coverage. Bold, adequately sized lettering is generally more suitable.
Treating Puff Like Flat Embroidery
Puff designs require different stitch planning. Simply applying a raised effect to an existing flat file does not automatically create a production-ready puff file.
Ignoring the Final Product
A design intended for a curved cap should be planned differently from artwork intended for a flat jacket or sweatshirt.
Choosing the Wrong File Format
Your embroidery machine needs a compatible file format. Always confirm the required format before production.
How We Prepare a 3D Puff File
At iDigitize, we use a manual digitizing approach for our embroidery services. Our website states that every design is manually reviewed by our digitizers, and our 3D puff service emphasizes manual digitizing and quality checking.
Our basic workflow is straightforward:
- You upload your artwork and provide production details.
- We analyze the design for puff suitability.
- We build the stitch structure around the foam effect.
- We review stitch flow, coverage, and design details.
- We provide the file in the required embroidery format.
Our website lists standard delivery at approximately 4–12 hours, with an urgent option of 1–4 hours for applicable orders.
Final Thoughts
3D Puff Digitizing is more than adding foam beneath an ordinary embroidery file. The artwork, stitch structure, density, lettering, spacing, and final application all need to work together to create a clean raised design.
If you are preparing a cap logo, bold lettering, emblem, jacket design, or hybrid embroidery project, iDigitize can review your artwork and prepare it for the required machine format. Our 3D Puff Digitizing Services focus on production-ready embroidery files, manual digitizing, and quality checking.
Send your artwork and production details to iDigitize when you are ready, and we can prepare the embroidery file according to your requirements.
FAQs About 3D Puff Digitizing
What is 3D Puff Digitizing used for?
3D Puff Digitizing is used to create raised embroidery by designing stitches that cover foam beneath the embroidered area. We commonly prepare puff files for caps, hats, logos, lettering, jackets, hoodies, and other apparel applications.
What designs are best for puff embroidery?
Bold logos, thick lettering, simple shapes, and clear emblems are generally suitable for puff embroidery. Very fine details, narrow lines, and small lettering can be difficult because they may not provide enough space for proper foam coverage.
Can I use a puff embroidery file on any machine?
The design must be supplied in a file format compatible with your embroidery machine. We support major formats including DST, PES, EMB, EXP, JEF, VP3, HUS, and XXX. Tell us your machine or required format when ordering so we can prepare the appropriate file.
How long does puff digitizing take?
Our 3D puff service page lists regular turnaround at approximately 4–12 hours. We also offer an expedited 1–4-hour option for time-sensitive orders. The appropriate turnaround depends on the order and selected service.
Can a flat embroidery design be converted into puff?
A flat design can often be adapted for puff embroidery, but it may require changes to its details, lettering, stitch structure, and proportions. We review the artwork first and adjust the digitizing approach according to the intended raised effect.